Hello there, buddies! In this article, we’ll show you how to set up your own mail server on a DigitalOcean (with standard email restrictions apply ) VPS.
Webmin is a web hosting manager, so if you’re looking for a way to manage your web hosting
Let’s get started if you’re ready.
If you want to keep up with me on this
Of course, you’ll need two things: a
A domain name and a DigitalOcean account
since you’ll be the one to set up our VPS.
DigitalOcean’s machine You don’t have to follow up if you don’t want to.
Simply watch the course and absorb the information.
so that you may construct your server
Let’s begin by creating a new droplet and installing Virtualmin on an Ubuntu 18.0 machine.
To create a new droplet, simply select
Let’s get started with Ubuntu and learn how we may use it in this article.
You can create your own mail server with your own computer.
You can use DigitalOcean or you can create your own VPS computer.

So, if you’re looking for a way to manage your web hosting, let’s get started if you’re ready.
If you want to keep up with me on this
Of course, you’ll need two things: a
A domain name and a DigitalOcean account
because you’ll be the one to set up our VPS.
DigitalOcean’s machine
You don’t have to follow up if you don’t want to.
Simply watch the course and absorb the information.
so that you can construct your server.
Let’s start by cwn I’ll select this configuration. It’s okay, it’s enough. I’ll select a region and go down and give it a name like Vmin and click create. Let’s wait a few seconds for the droplet to be created. Alright, so here we are. This is the machine that was created and this is the IP. Let’s copy the IP address and we have to access it using PuTTY using the SSH protocol. If you remember, we have to go to my email and check.

And here’s the password in my email, just paste it. It’ll ask you to reset your password right away. Just enter your current password again and your new password and retype it. Nothing difficult here. It’s a very simple operation now to install Virtualmin. It’s also very simple. Just run this command line here to get the installation files from the Virtualmin website.

Allow it to be completed. Okay, awesome. The installation was successful, and everything is fine. To configure the server, you can use the hostname, my domain name, or the IP address, so let’s test that. I’ll get the IP address again, and in the browser, let’s run HTTPS and paste the IP address, and now let’s use port 10,000. Let’s run it, and it says SSL warning, which is fine, we’ll address it later, and it’s quite lovely, so this is Webmin and the login screen for our server. Alright, now let’s do some basic settings for our server.
I’m going to map my domain name so I can access my server using my domain name rather than my IP address, so let’s go back to GoDaddy and find my domain here, and then let’s go to manage my DNS zone, which we did before. It’s good to review. OK, ok, parking now in the A Value @ just edit this and remove the parking, remove the points, and simply paste your IP address here, save the circle, and provide your DNS for more information So I’ll paste my domain name here and update the values all right, so I’ll paste my domain name here and run it again, and we can now access our website.
The server’s domain name is newxweb.net.
Naturally, your domain name will not be identical to mine. So let’s log in with the root credentials we entered when we first installed our server, and the first time you log in, it’ll ask you to run a post-installation wizard, which will ask you to set up some basic server configuration, so let’s go with this wizard, click next, and the first thing it asks you is if you want to preload a file, so let’s go with this wizard, click next, and the first thing it asks you is if you want to preload
It will be faster, but it will also use more resources.
memory I’m going to utilize this for myself because I’m a bit of a nerd.
They have a capacity of one or two gigabytes.
It suffices for me in terms of memory.
Suppose your server has a capacity of 500.
megabytes, or megabytes
There isn’t enough of you.
If you don’t need them, you can turn them off.
I’ll save those yeses for me.
a high level of performance and a quick click on the next button.
If you wish to, you can choose the second option.
It’s a good idea to turn on the virus scanning because it’s really useful.
Virus scanning should be enabled if
You’re utilizing your own mail server, thus
if the memory usage is around 600 megabytes.
It’s a good idea to activate this next click.
In addition, the spam assistance is excellent.
important
It’s the spam filter for your mail server, so I’ll activate it and click Next. If you’re only using your web server to host websites, you might not need the spam filter, but since we’re going to utilize it, we’ll need it.
You can enable or disable database servers here. We have two types of services: MariaDB MySQL server and PostgreSQL server. If you don’t want to install any websites or databases on this web server, you can turn both off.
You can disable these databases if you’re only using it as a mail server, but if you want to install a specific website, such as WordPress, PHP, or another website, you’ll need to activate them. If you’re using both, I’ll install only WordPress for testing later.
In this course, I will simply enable the MySQL server; I will not use PostgreSQL, so you can turn it off. Next, you can set your MySQL password. This is the password; copy it and put it in a notepad so you can use it later.
Okay, let’s start with the basics and go from there. I believe it’s rather straightforward.
Now it will ask you to do some database configuration for me because I’m only going to install one website for testing. If this is a web server where you’ll install multiple websites, perhaps higher processing websites, you’ll need a huge system or a large one. It’s up to you. It’s up to your configuration here. We’re going to use a mail server and a small website, so medium will suffice.
After you’ve checked everything, move on to the next step. I’m not going to use the internal DNS zone, and this is a crucial decision. It asks if you want to keep your passwords in hashed or plain text format. It is strongly suggested that you use hashed passwords solely to ensure that your passwords are secure, especially if you use mailboxes and e-mail.
JerroJrs,errors,SNoperation Now justo, we’re all done now. Let’s go on to the next step. It will ask you to recheck your configuration. So let’s recheck and refresh the configuration, and it will check everything and notify you of any issues. I hope it’s an easy operation. It will now ask you to recheck and refresh the configuration, after which it will check everything and notify you if there is a problem. I hope it’s an easy operation. Now just. It choose the correct options for your situation chooseschoosessituation.chooses will ask you to recheck and refresh configuration and it will check everything
Everything is fine, it’s updating nicely, so everything is fine, and my server is now operational. Let’s start by creating a virtual server. You can think of a virtual server as an account in cPanel. You create a virtual server, give it a domain name, and then create accounts, mailboxes, and so on. So simply click on create virtual server and here we are.
1 will use the same domain name as my server; you may use a different one if you prefer, but let’s get started now.
Please keep this experimental domain name so that we can use it in the future.
Continue by adding a description if desired.
and then create a password for the administrator
for this virtual server or for this account
You have the option of selecting a server configuration.
Here are the default settings for the template.
You can make a template and then use it.
when you’re building virtual servers
I won’t go into depth right now because there’s a lot to cover.
a standard
plan You can set a custom user name here or keep it automatic if you’re using multiple plans or selling accounts. I’ll use a custom one and call it newxweb, and now in the Advanced Options section, you can enter the contact email address or it will use the main administrator mailbox, you can set a group name, and you can set a prefix for the mail user names. I’ll keep everything set to automatic. It’s preferable now to go to enable features, where you can set up a DNS zone and an SSL website for this virtual server. Just bear in mind that this virtual server isn’t just for this virtual server.
We have a lot of features that we are not concerned with now on my course, just click on create server to continue creating our virtual server, wait a few seconds, and very good now we have a virtual server, as you can see now we are inside the virtual server newxweb.net. Now that we know the domain name of my virtual server, we can build email boxes. To do so, go to edit users and create a new email address. Next, click add a user to this server to launch the add user wizard. Enter an email address, for example, support the real name.
Simply enter a password and, if desired, a recovery password. Let’s move on to the second option, where you can choose a home directory for this email address. Let’s keep it automatic. We have the email settings where you can enable this primary email address, add additional email addresses, and check this email for spam and viruses.
It’s a bit of a no-brainer. You can set mail forwarding settings and forward your inbox to another email if you want, but that’s not my problem right now because I want to configure my mail server to use it as my personal mailbox. You can also set other permissions, like access to web directories and access to your inbox.
Okay, now it’s very simple and here we have a new email address: support@newxweb.net. As you can see, we only have email access; we don’t need FTP, SSH, or anything else related to websites or my server. Very nice. Let’s test our email; send and receive using Roundcube webmail client. However, you should be aware that Roundcube webmail client cannot access certain databases on your server or web directories by default.
You can also install SquirrelMail if you want, but I prefer Roundcube, so just check it and show install options, and now click on install. It’s very simple. The process will be automated, and everything will be done automatically. Just wait a little bit. Very nice, so let’s go back to the virtual server details and now we have Roundcube installed. To open Roundcube, let’s go to installed scripts and you’ll find I
as well as the public directory or the installation directory, if that’s what you’re looking for.
In this case, the database is used in newxweb roundcube access roundcube Now all we have to do is copy this URL and paste it here, and we’re at the Roundcube login screen. Let’s login now. Let’s compose an email. Let’s click compose and let’s enter my email address and test email. This is a test email from Webmin. Let’s now try to send this email. Click on “send”. Oops! We have an error. It says SMTP error 454: Authentication failed. If you encountered this error while utilizing Roundcube with Webmin, simply let’s try again . Simply. Simplyhis, I will show you a small Letemail.or thi. Let’s click compose and let’s enter my email address and test email. This is a test email from Web.
Let’s open the file manager and navigate to Roundcube, then config, and we’re done. Right click, go to edit, and here we have two parameters: username and password. Just remove these inputs and leave them empty to use the credentials. We’re right. Let’s go back to Roundcube. Let’s send this So this was a little tip if you run into this authentication problem in Roundcube with Webmin. OK, OK, so we sent the email.
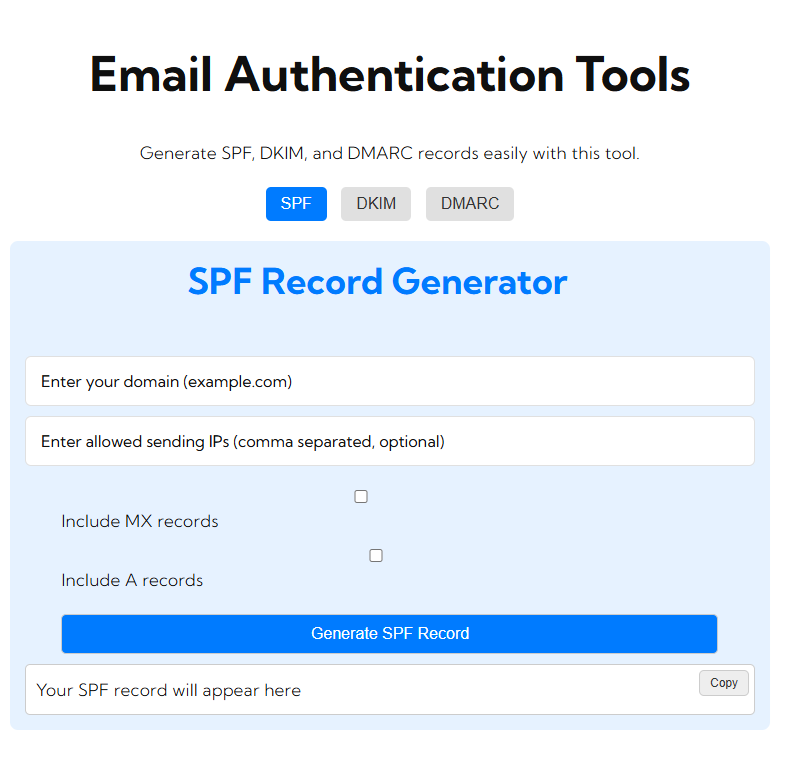
It’s OK because we didn’t configure SPF and DKIM . OK,email. We now have email. OK, so we sent the email. and then we have support@newxweb.net. Let’s open it up, and here’s my email from my own mail server: Hi friends, congratulations on building your own mail server. If you’re interested in learning more about how to avoid SPF, him, SPF DKIM, and different techniques in building mail servers, you can check out my Take the three-hour premium course on Udemy from the link in the description. It’s only $9.9 for a limited time, so check it out if you’re interested.
and securing it with a free SSL certificate from Let’s Encrypt, so let’s get started. So the first thing you need to do on your server is go to edit virtual server, here we are, then down to enabled features, and make sure Apache SSL website enabled is checked. Simply save the virtual server. Your server will now refresh; just wait a moment. Go to Server Configuration > Manage SSL Certificate. This option will not appear unless you enable Apache SSL in the first step, so let’s click on this and now we have different possibilities. You can make a signature request for a certain authority.
We can choose a specific certificate authority. Now we need to encrypt because we need a free certificate. You can see these are the domains associated with this virtual server. This will be encrypted with the SSL certificate. You can also set the renewal to be automatic or you can set a period where you want it to be renewed.
Now let’s try to access our website using HTTPS with a new certificate. I’ll open Firefox and try to access my server again, and as you can see, our server is now secured with a full SSL or a trustworthy SSL certificate from Let’s Encrypt, which you can see here. I hope this lecture was helpful; if you need any assistance or encounter any errors while configuring your server, please contact me and I’ll be happy to assist you at any time. Alright, now I’ll show you how to connect to your mail server using Outlook. I know I already showed you how to do that in the cPanel section in the mailbox section, but I’ll show you how to connect to your mail server using Outlook.
Let’s Go down here and go to email settings, then go to mail client configuration. Ashere,configuration. You can see here we can configure auto configuration. I’ll say yes, enable it and click save. very nice. Let’s wait and now the mail client configuration is enabled.
I’m going to open Outlook 2016 and try to connect to my mail server, so let’s go to File and click Add Account, then input my name and email address newxweb.net, then enter your password and click Next, then wait and wonderful as you can see.File
Everything was automated, so just enter your email and password, and everything will be configured automatically. Now here is my account, and as you can see, we have an email sent from my Gmail account. So that’s how you can enable auto configuration on your Webmin or Virtualmin server . now and then connect through Outlook. Now! Congratulations on finishing this awesome article. Now you know how to build your own mail server using your own VPS machine and the Webmin web hosting manager system. I hope you found this article useful, and if you have any questions, please leave a comment below or contact me directly through my website or Facebook page.
Please check out my premium course in the description if you’re interested. You’ll get premium support if you enroll in that course. Thank you for watching, and if you enjoyed It, the article, don’t forget to like it and subscribe to our channel to receive notifications. You can also take a look at some of our previous lectures. Thank you for your time and consideration, and I hope to see you again in future articles.