It can bring into your systems a great enhancement in delivering emails very reliably and efficiently. Below is a comprehensive guide on setting up an SMTP relay server, including configurations and best practices.
What is a Relaying SMTP Server?
This is one that allows you to send messages through it instead of your ISP’s SMTP server. It really comes in handy if you have business use and would have to send a large number of emails or need more control over the delivery of your emails.
Advantages of Utilizing a Relay SMTP Server
- Enhanced Deliverability: A dedicated SMTP relay can help improve your email deliverability rates.
- Custom Domain: Send emails out using your custom domain for a more professional look.
- Analytics: Most SMTP relay services include analytics and reporting tools with which to measure your email campaigns.
- Scalability: Your email sending easily scales with business growth.
Your Own SMTP Relay Server Needs
- A Server: VPS (Virtual Private Server) or a server dedicated to the task.
- Domain Name: Registered domain from which you will send your emails.
- Email Server Software: Postfix, Exim, or even Sendmail.
- Knowledge of Basic Command Line: Familiarity with a command line will be required.
Step-by-Step Guide to Setting Up an SMTP Relay Server
Step 1: Choose Your Server
- Select a Hosting Provider: Choose a VPS or dedicated server provider like DigitalOcean, AWS, or Linode.
- Install the Operating System: Common choices include Ubuntu, CentOS, or Debian.
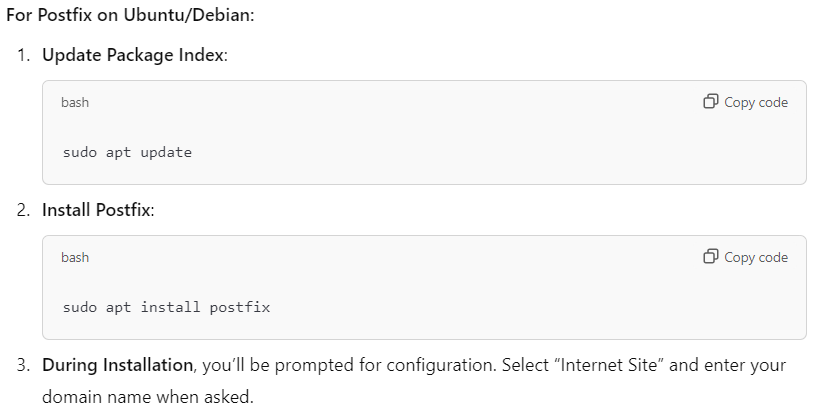
Step 2: Install the SMTP Server Software
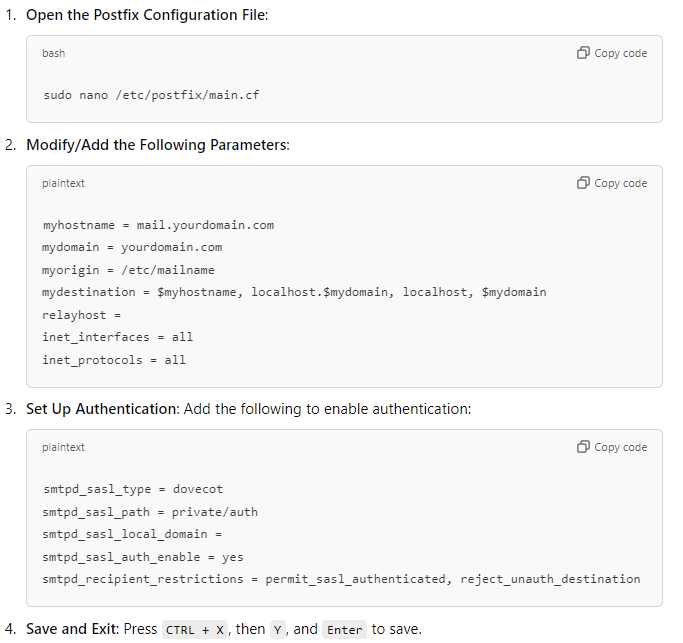
Step 3: Configure Postfix
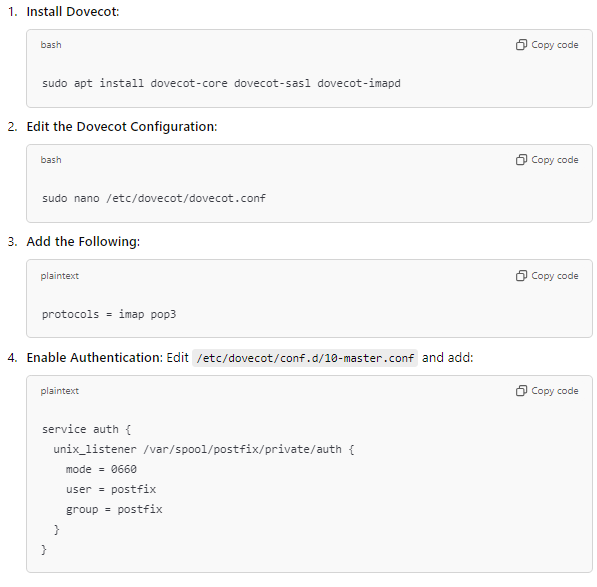
Step 4: Install Dovecot for Authentication
Step 5: Restart Services
Restart both Postfix and Dovecot to apply changes:

Step 6: Set Up DNS Records
- MX Records: Point your domain’s MX records to your mail server’s IP address.
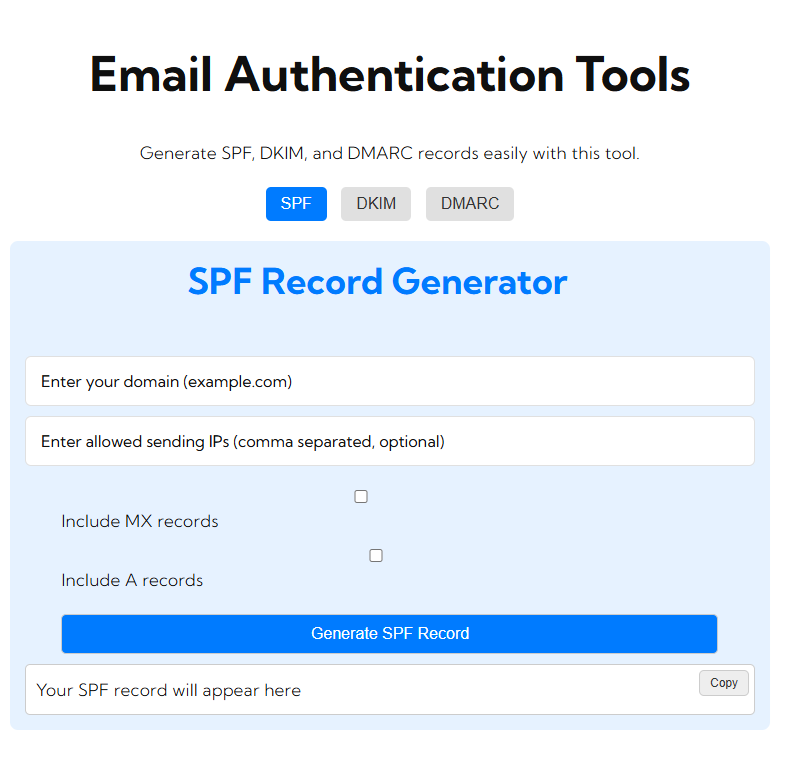
- SPF Record: Add an SPF record to allow your server to send emails on behalf of your domain.

DKIM: Set up DKIM (DomainKeys Identified Mail) to help with email authenticity. This involves generating a public/private key pair and adding the public key to your DNS records.
Step 7: Test Your SMTP Relay Server

Step 8: Monitor and Optimize
- Log Files: Check the logs at
/var/log/mail.logto monitor your email activities and troubleshoot any issues. - Rate Limiting: Implement rate limiting to prevent abuse and ensure your server remains reputable.
Conclusion
Setting up an SMTP relay server can seem daunting at first, but it provides numerous benefits for businesses needing to send emails efficiently and reliably. By following the steps outlined above, you can create a robust SMTP relay server that meets your email needs. Always ensure to monitor and maintain your server to prevent issues and improve deliverability over time.